SitecoreAI Forms: Handling Form Submissions with a Webhook and Sending Email using Next.js Application
Thursday, September 24, 2026
Summary
Forms in SitecoreAI introduces a more modern, headless and cloud-oriented approach compared with traditional Sitecore XM/XP Forms. Instead of relying heavily on Sitecore server-side processing, custom submit actions, and Sitecore-based storage, SitecoreAI Forms integrates with external systems primarily through webhooks. Forms can be created and managed in the SitecoreAI Forms application, added to Pages or headless applications, and configured to send submission data to an external API. This allows developers to handle business logic—such as sending emails, storing data, or integrating with a CRM—in an external service such as a Next.js API, Azure Function, or other backend, making the overall solution more flexible and aligned with SitecoreAI's headless architecture.
In this article, I'll walk you through building a simple end-to-end example. The goal is to keep the implementation simple. SitecoreAI will be responsible for collecting the form data, while our API will receive the submission and send an email notification.
SitecoreAI Form → Webhook → Next.js API → Email
Architecture
               User
                │
                │ submits form
                ▼
        SitecoreAI Form
                │
                │
                ▼
            HTTP POST
                │
                │
                ▼
        Next.js Webhook API
                │
                │ validate/process data
                ▼
            Email Service
This architecture has several advantages:
Sitecore remains responsible for the form.
The frontend does not need to know anything about email credentials.
Email logic stays in the backend.
The same API can potentially handle submissions from multiple forms.
Authentication can be added to the webhook.
Create a Form in SitecoreAI
To open the Forms application, Go to
SitecoreAI portal → select environment → Design Studio → Forms
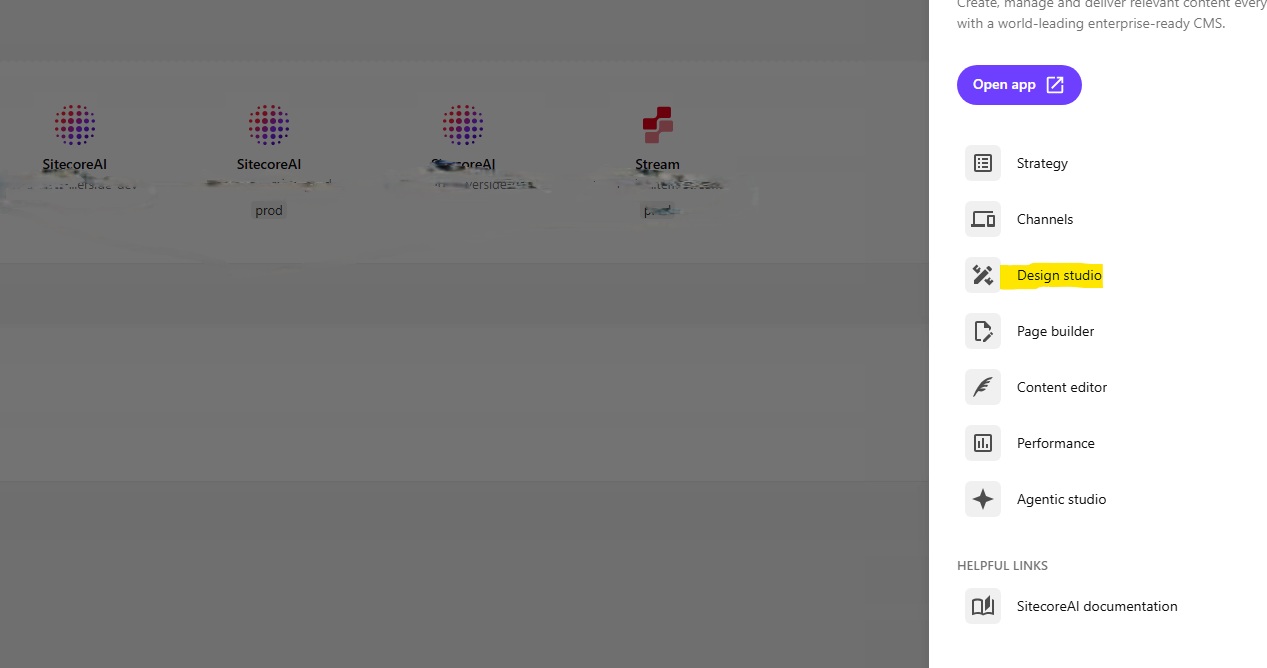
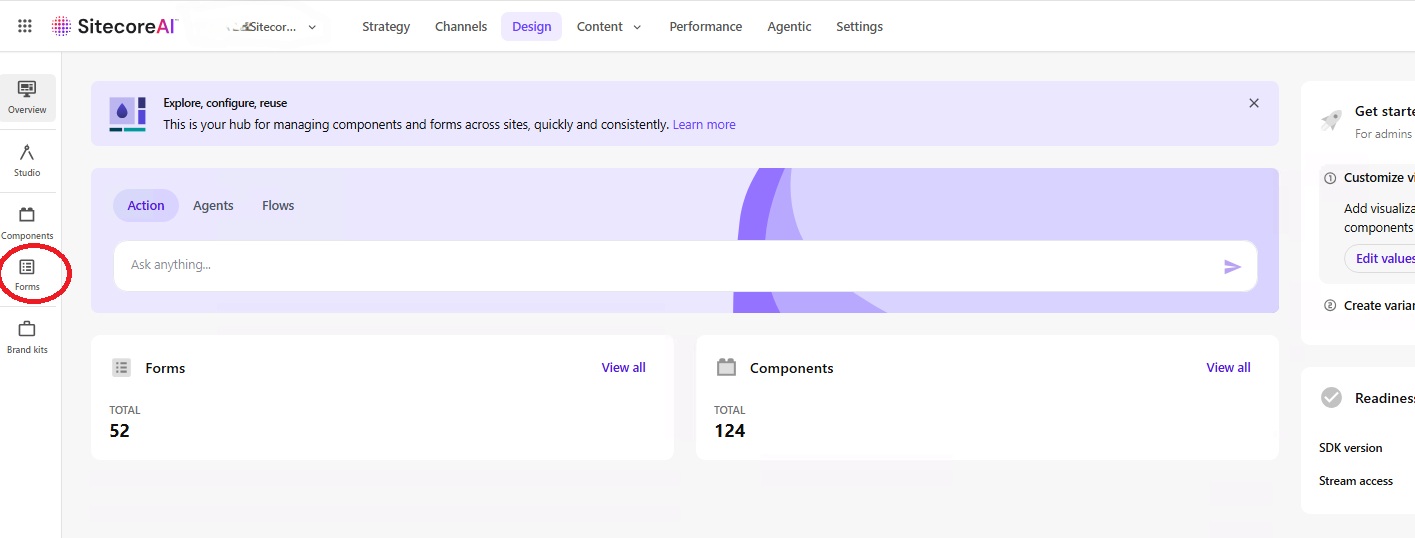
Hit Create form button. For this example, let's create a simple Contact Us form with fields First Name, Last Name, Email, Phone and Message.
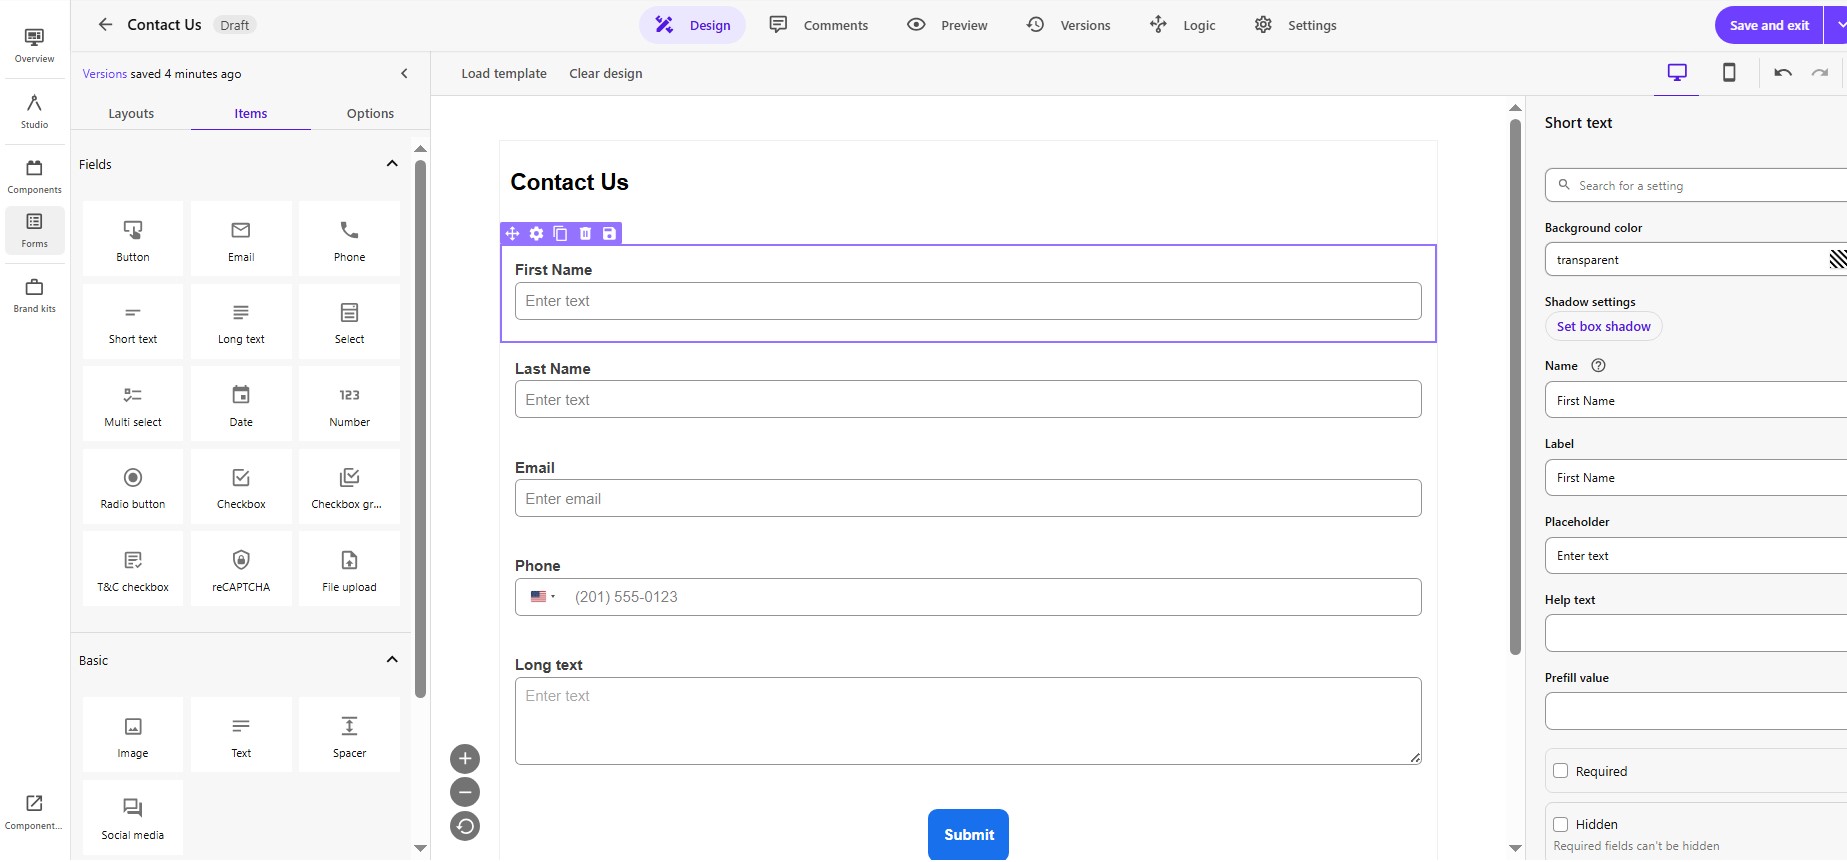
SitecoreAI Forms provides a visual form editor where fields and layouts can be added to the form.
Create the Webhook
The next step is to tell SitecoreAI where the submitted form data should be sent.
From the form editor:
Settings → Choose webhook / Manage Webhooks
To create a new webhook, you need
Name
URL
Authentication
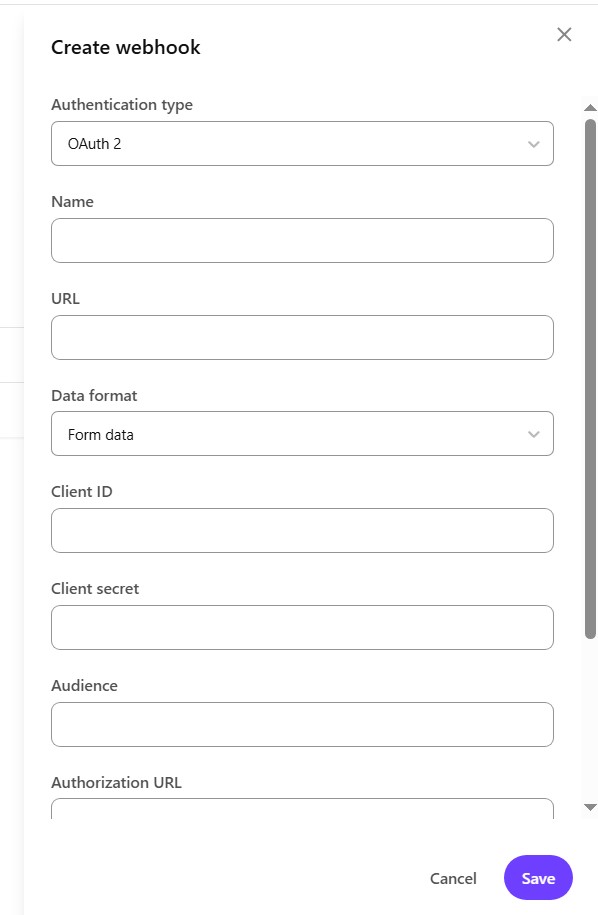
Sitecore currently supports the following webhook authentication options:
OAuth 2
Basic authentication
API key
No authentication
Using authentication is preferable to leaving the endpoint completely open.The webhook endpoint must be publicly accessible over HTTPS. Sitecore does not support localhost or private network addresses for these webhooks.
For local development, you could expose your local API temporarily using something such as ngrok.
For example:
https://abc123.ngrok-free.app/api/forms/contact
Configure the Form to Use the Webhook
Once the webhook has been created, return to the form's Settings.
Under the webhook configuration, select the webhook that you just created.
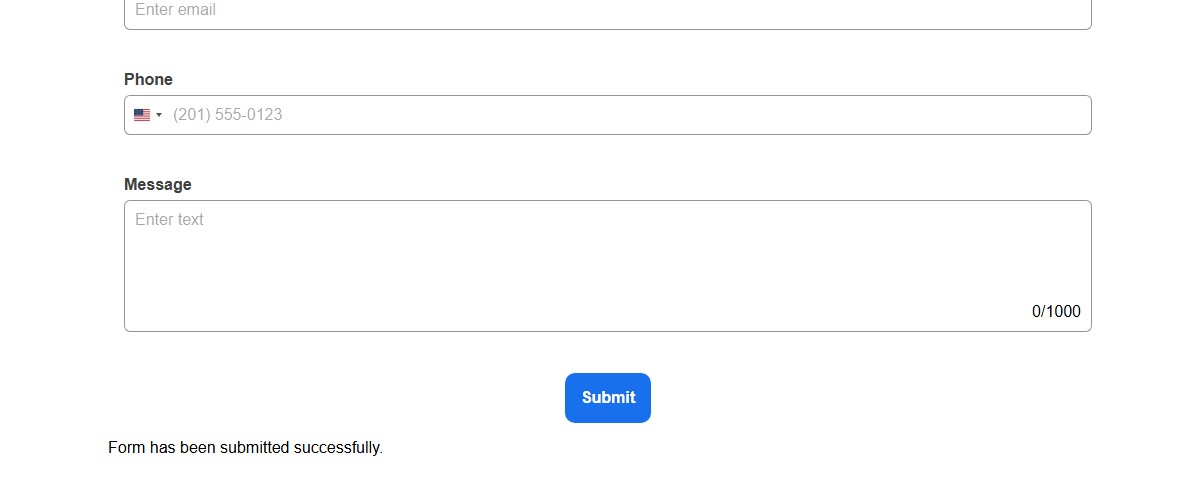
You can also configure what happens after the form submission.
    Submit Action
    OR
    Show message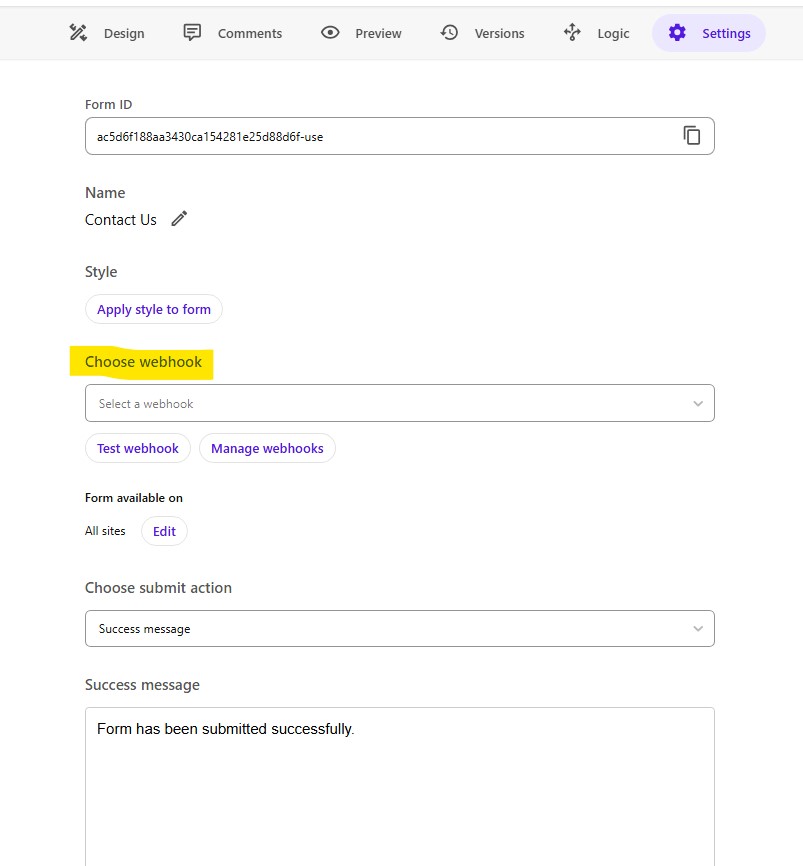
Test the Webhook
To make the form available on the pages, you need to activate it. Before activating the form, Sitecore provides a Test webhook option.
Go to:
Settings → Webhook → Test webhook
Fill out the form and submit it.
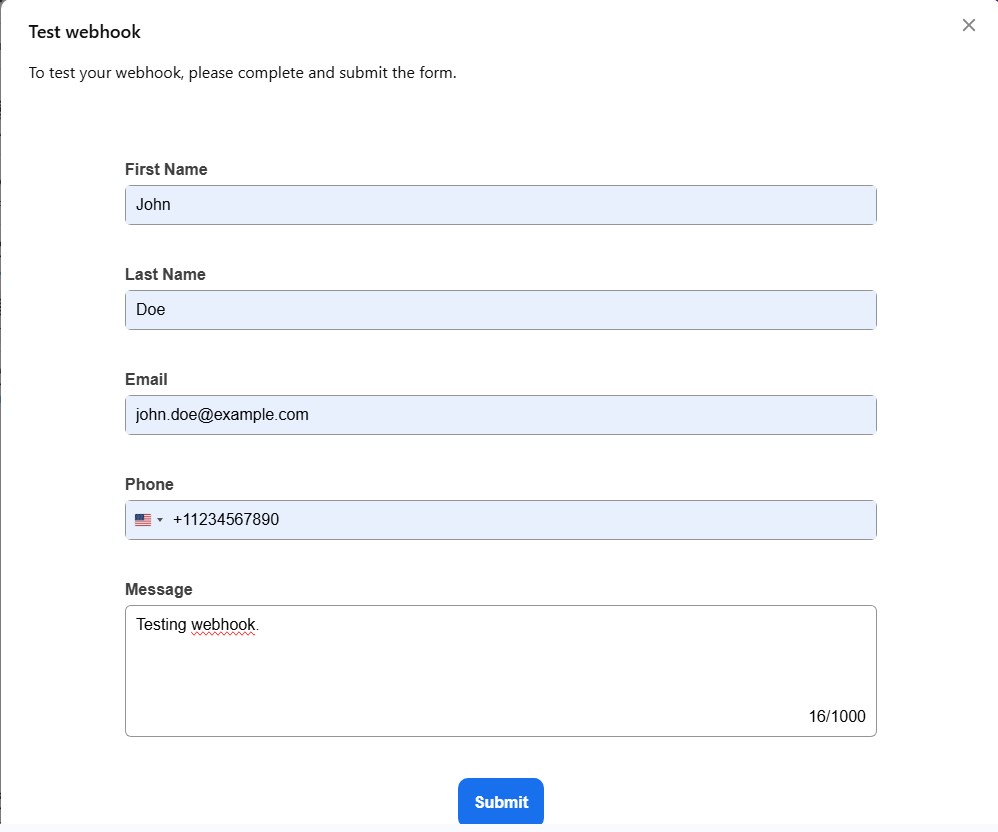
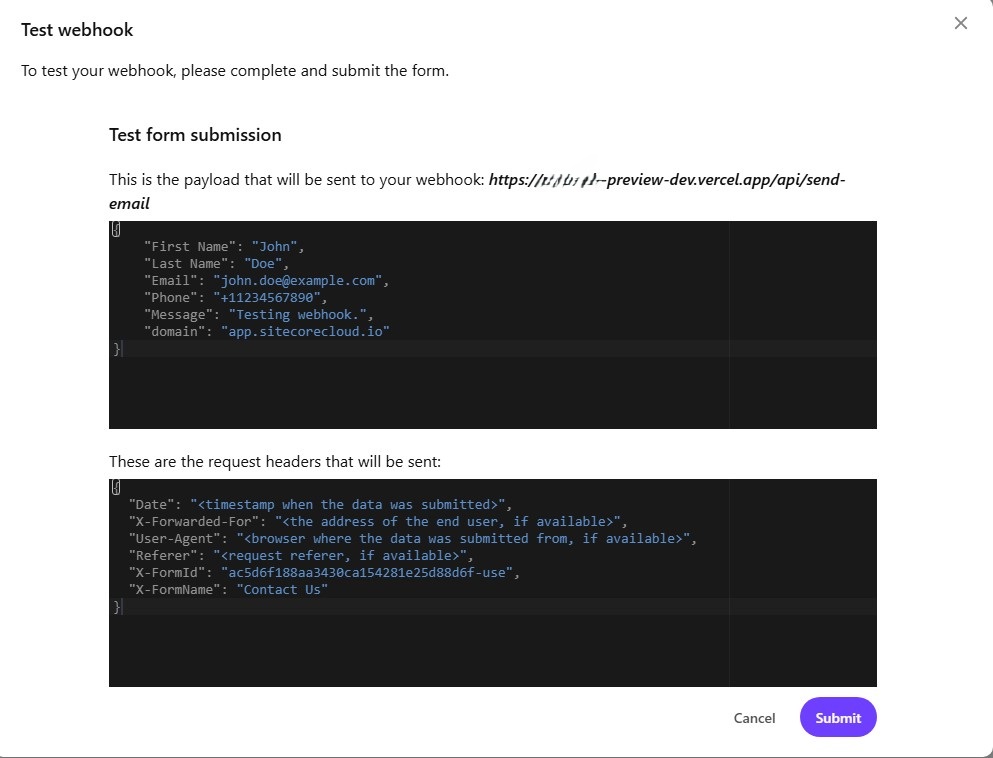
Sitecore displays information about the request, including:
URL
payload
Request headers
This makes it very useful for determining exactly what your API needs to handle.
Create the Next.js Webhook API
Now let's create the backend endpoint. If you're using Next.js App Router, create:
    app/
    └── api/
        └── submit-form/
            └── route.ts
The basic API can look like this:
import { NextRequest, NextResponse } from "next/server";
    export async function POST(request: NextRequest) {
        try {
            const body = await request.json();
            console.log("SitecoreAI form submission:", body);
            return NextResponse.json({ success: true, });
        } catch (error) {
            console.error("Form webhook error:", error);
            return NextResponse.json(
                {
                    success: false,
                    error: "Unable to process form submission",
                },
                { status: 500, }
            );
        }
      }
At this point, submit the SitecoreAI form again. You should see the request payload in your Next.js server logs.
Send the Email
Your webhook API can now pass the submitted data to an email provider.
The architecture is:
            SitecoreAI
                │
                │  POST
                ▼
            Next.js
                │
                │  webhook
                ▼
        Email Provider
                │
                │
                ▼
            Recipient
For example, the backend could call an email service API:
import { NextRequest, NextResponse } from "next/server";
import nodemailer from "nodemailer";

export async function POST(req: NextRequest) {
  try {
    const internalKey = req.headers.get("x-internal-key");

    if (internalKey !== process.env.SEND_EMAIL_API_KEY) {
      return new Response("Unauthorized", { status: 401 });
    }

    const { to, from, subject, bodyHtml, cc, bcc } = await req.json();

    // Create transporter
    const transporter = nodemailer.createTransport({
      host: process.env.EMAIL_SERVICE!,
      port: 587,
      secure: false,
      auth: {
        user: process.env.EMAIL_USERID,
        pass: process.env.EMAIL_PASSWORD,
      },
    });

    // Send email
    await transporter.sendMail({
      from,
      to,
      cc,
      bcc,
      subject,
      html: bodyHtml,
    });

    return NextResponse.json({
      success: true,
      message: "Email sent successfully",
    });
  } catch (error) {
    console.error("Failed to send email:", error);

    return NextResponse.json(
      {
        success: false,
        message: "Failed to send email",
      },
      { status: 500 },
    );
  }
}
The exact implementation depends on the email provider you're using.
The important point is that the email API key remains on the server. It should never be placed in the browser or exposed through the SitecoreAI form.
Now your submit-form api can be updated as..
    import { NextRequest, NextResponse } from "next/server";
    export async function POST(request: NextRequest) {
    try {
        const First Name = getFieldValue("First Name");
        const Last Name = getFieldValue("Last Name");
        ...
        const EmailBody = 'Build email body with the required form fields...';

    const res = await fetch(
      '${ process.env.NEXT_PUBLIC_SITECORE_WEBSITE_URL }/api/submit-form',
      {
        method: "POST",
        headers: {
          "Content-Type": "application/json",
          "x-internal-key": process.env.SEND_EMAIL_API_KEY!,
        },

        body: JSON.stringify({
          to: 'support@example.com,emailfieldvalue@formtheform.com',
          from: 'website@example.com',
          cc: 'cc-support@example.com',
          bcc: 'bcc-support@example.com'
          subject: 'Your subject',
          bodyHtml: '${EmailBody}',
        }),
      },
    );
  } catch (error) {
    console.error("Form webhook error:", error);
    return NextResponse.json(
        {
            success: false,
            error: "Unable to process form submission",
        },
        { status: 500, }
      );
    }
  }

function getFieldValue(
    fields: { name: string; value: string }[],
    fieldName: string
): string {
    return (
        fields.find(
          (field) =>
          field.name.toLowerCase() === fieldName.toLowerCase()
      )?.value ?? ""
   );
}
The getFieldValue function is used to retrieve the value of a specific form field from the fields submitted by SitecoreAI Forms. In this implementation, the field name is provided explicitly, allowing the API to access individual form values as needed.
However, if the requirement is to include all submitted form fields in the email, the implementation can be made more generic. Instead of explicitly retrieving each field by name, the API can dynamically iterate through the fields included in the webhook payload and transform them into key-value pairs.
The API can then iterate over these key-value pairs and use the field names and values to construct the email content. This eliminates the need to hard-code individual form field names in the API.
This approach provides an important advantage: the same webhook API can be reused across multiple SitecoreAI Forms, regardless of the fields defined on each form. As forms are added or modified in SitecoreAI, the API can automatically process the submitted fields without requiring corresponding code changes.
In other words, rather than designing the API around a specific form, the API becomes form-agnostic, making it easier to maintain and reuse across the application.
Conclusion
SitecoreAI Forms provides a simple and flexible way to collect form submissions without requiring developers to build and maintain the form UI from scratch. It allows content authors to manage forms directly within Sitecore while providing the flexibility to integrate submissions with external applications and services through webhooks.
The webhook capability is particularly valuable for headless SitecoreAI implementations. It enables the form experience to remain managed within Sitecore, while submission processing can be handled by a separate application backend.The other most important implementation detail is to first use Test Webhook to inspect the actual payload generated by your SitecoreAI form, and then build the API against that payload. Sitecore explicitly provides the Test Webhook experience for this purpose.
Overall, combining SitecoreAI Forms with a Next.js webhook API provides a clean separation between content-managed form configuration and server-side submission processing, making it a practical approach for headless SitecoreAI solutions.